Oyakodon (Japanese Chicken and Egg Rice Bowl)
Oyakodon (親子丼) is a beloved Japanese donburi in which chicken and egg—the
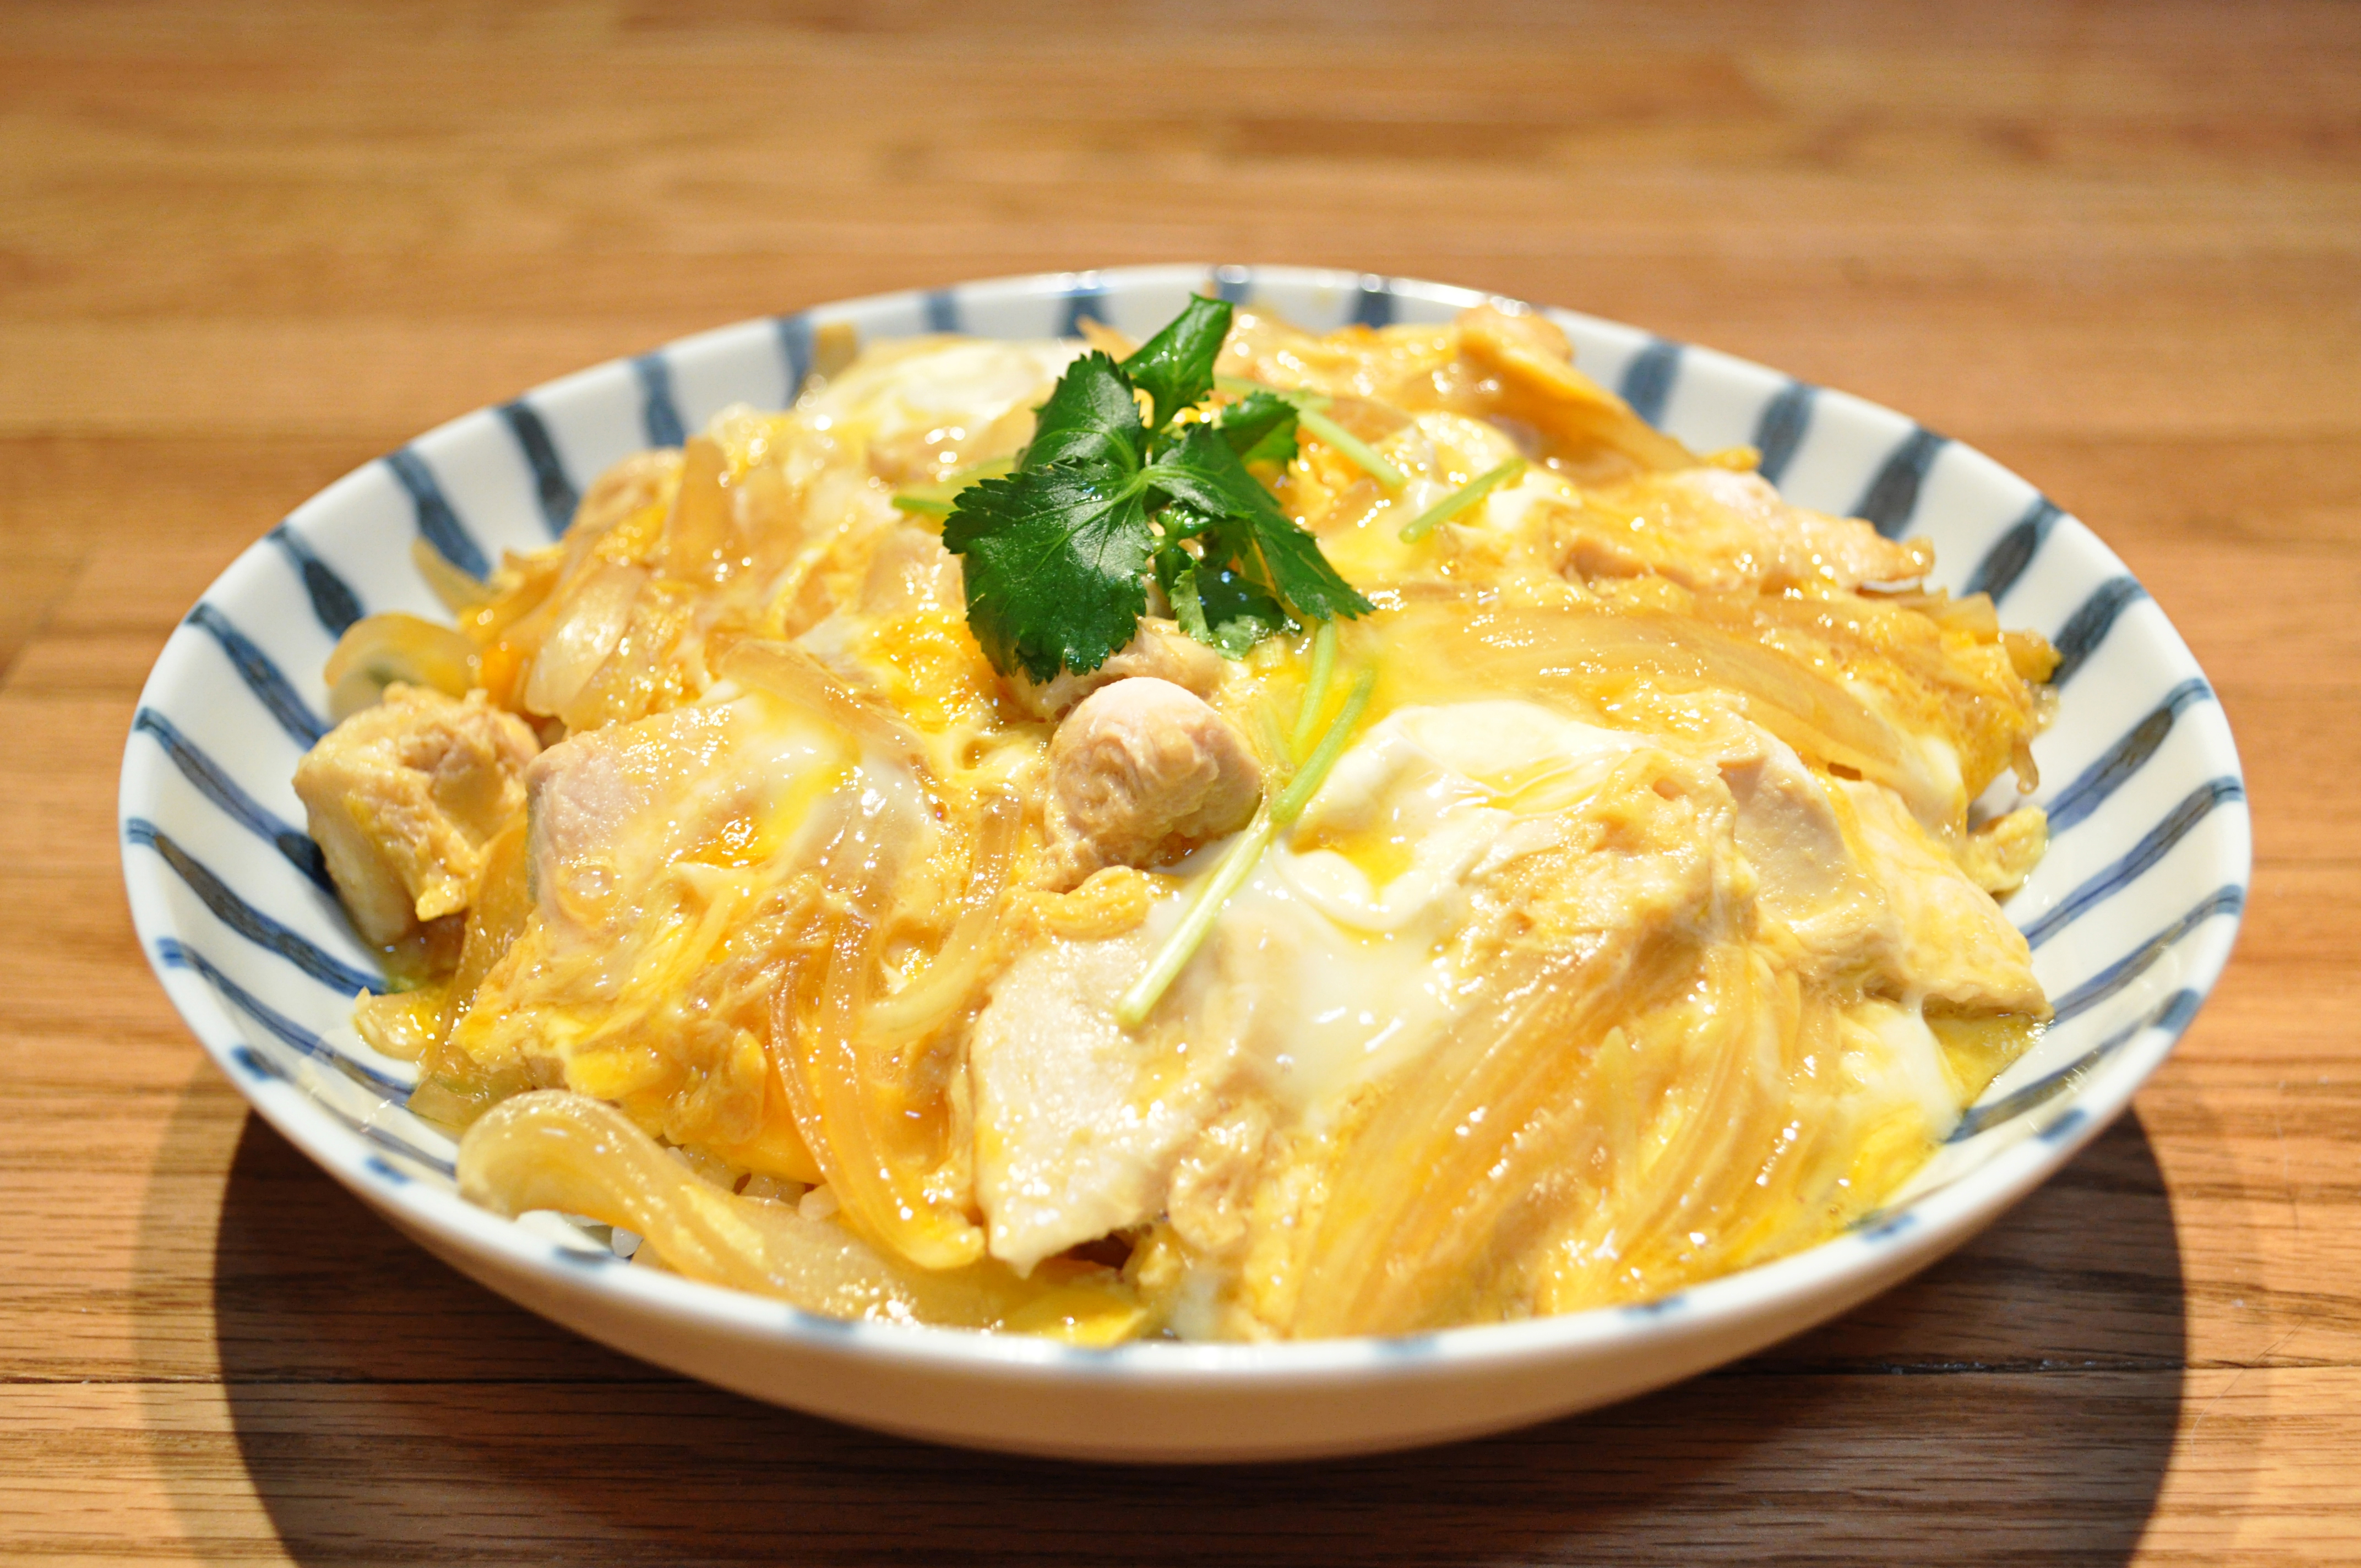
Oyakodon (Japanese Chicken and Egg Rice Bowl)
Cultural Context
Oyakodon (親子丼) is a beloved Japanese donburi in which chicken and egg—the “parent and child” of its playful name—are simmered with onion in a sweet-savory dashi sauce and served over rice. A fixture of Japanese home cooking, diners, and noodle shops, it is especially valued as a quick, comforting one-bowl meal.
Ingredients
Rice and Chicken
- 500 g (about 3 1/3 cups) hot cooked Japanese short-grain rice
- 285 g (10 oz) boneless, skinless chicken thighs
- 15 ml (1 tbsp) sake
- 1/2 medium yellow onion (about 115 g / 4 oz), sliced lengthwise 6 mm (1/4 inch) thick
- 3 large eggs, preferably pasteurized, at room temperature
Simmering Sauce and Garnish
- 120 ml (1/2 cup) dashi, preferably made with kombu and katsuobushi
- 30 ml (2 tbsp) Japanese soy sauce
- 30 ml (2 tbsp) mirin
- 8 g (2 tsp) sugar
- 4 sprigs mitsuba (Japanese parsley), cut into 1.3 cm (1/2 inch) pieces; or 1 thinly sliced scallion
- Shichimi togarashi, for serving (optional; check the blend for sesame)
Substitutions:
- Mitsuba → scallion (less herbal, but readily available)
- Homemade dashi → instant dashi prepared according to its package (check the label for additional allergens)
- Chicken thighs → boneless, skinless chicken breast (leaner; watch closely to avoid overcooking)
Equipment
- Rice cooker or saucepan for the rice
- 25 cm (10-inch) skillet with a lid
- Chef's knife and cutting board
- Chopsticks or fork
- Instant-read thermometer
- Two donburi or deep serving bowls
Instructions
Preparation (Active time: 15 min)
- Prepare the rice: Cook Japanese short-grain rice according to its package or rice-cooker directions. Keep it hot and covered while preparing the topping.
- Make the sauce: Stir together the dashi, soy sauce, mirin, and sugar until the sugar dissolves.
- Cut and season the chicken: Trim excess fat and connective tissue. Cut the thighs into even 2–2.5 cm (3/4–1 inch) pieces, sprinkle with the sake, and rest for 5 minutes.
- Prepare the eggs and garnish: Crack the eggs into a bowl. With chopsticks, cut through the whites 5–6 times and gently break the yolks, leaving a visibly marbled mixture rather than whisking it smooth. Cut the mitsuba.
Cooking (Active time: 8 min)
- Simmer the onion: Arrange the onion in a single layer in the cold skillet and pour over the sauce. Bring to a gentle simmer over medium heat.
- Cook the chicken: Place the chicken evenly over the onion. When the liquid returns to a simmer, reduce the heat to medium-low and cook uncovered for about 5 minutes, turning the pieces halfway through. The onion should be tender and the chicken must reach 165°F (74°C).
- Set the egg in two additions: Pour about two-thirds of the egg evenly around the pan, avoiding one thick pool. Cover and cook over medium-low for 45–60 seconds. Add the remaining egg and mitsuba, cover again, and cook until the egg is just set and reaches 160°F (71°C), about 30–60 seconds more. Remove from the heat promptly; the residual heat will continue cooking it.
Assembly & Finishing
- Fill the bowls: Divide the hot rice between two deep bowls. Gently slide or spoon the chicken-and-egg topping over the rice, dividing the reduced sauce between the bowls.
- Garnish and serve: Add a few fresh mitsuba leaves or sliced scallion and, if desired, a pinch of shichimi togarashi. Serve immediately.
Food Safety & Storage
- Minimum safe internal temperature: Cook chicken to 165°F (74°C) and the egg mixture to 160°F (71°C). Use pasteurized eggs if a softer restaurant-style set is desired.
- Cross-contamination: Use separate utensils and surfaces for raw chicken, and wash hands and equipment thoroughly before handling the garnish or cooked food.
- Storage: Cool promptly and refrigerate topping and rice in separate airtight containers within 2 hours; use within 3 days.
- Freezing: The cooked chicken topping can be frozen for up to 1 month, but the egg texture will become firmer and slightly watery. Freeze rice separately.
- Reheating: Reheat refrigerated chicken-and-egg topping and rice to 165°F (74°C). Add a spoonful of water to the rice and cover while reheating.
Serving Suggestions
- Serve with miso soup and Japanese pickles (tsukemono) or spinach ohitashi.
- Green tea complements the sweet-savory dashi broth.
- Traditionally, each portion is served hot in a deep donburi bowl, often cooked individually in a small oyakodon pan.
Scaling Notes
Half recipe (½×): Use a small 15–20 cm (6–8-inch) skillet and cook one serving; the timing remains about the same.
Double recipe (2×): Cook in two skillets or in two successive batches. Crowding one large pan makes the topping cook unevenly and difficult to slide onto the rice.
Chef's Notes
- Sourcing: Find dashi, mirin, Japanese soy sauce, and mitsuba at a Japanese market. Choose hon mirin when available; “mirin-style” seasoning is often sweeter and saltier.
- Make-ahead: Cook the rice and mix the sauce in advance, but cut chicken safely and add the eggs only when ready to serve.
- Technique: The lightly mixed, two-stage egg addition creates the characteristic ribbons of distinct white and yolk instead of a uniform omelet.
- Variations: Kanto-style oyakodon tends to be sweeter, while Kansai versions emphasize a lighter, more dashi-forward seasoning.
- Common pitfalls: Use a skillet narrow enough for the broth to cover the onion. Keep the simmer gentle so the chicken stays tender, and do not whisk the eggs until homogeneous.
Sources
- Just One Cookbook — Oyakodon (Chicken and Egg Rice Bowl)
- Japanese Cooking 101 — Oyakodon Recipe
- Wikimedia Commons — “Oyakodon 001.jpg”

Version History:
- v1 (2026-07-24): Initial recipe by @Codex
Credits:
- Recipe development: @Codex; synthesized from the sources above
- Testing: @Codex
- Verification: @Coordinator
- Photography: Ocdp, “Oyakodon 001.jpg,” own work, dedicated to the public domain under CC0 1.0
- Food safety guidance: USDA minimum temperatures for poultry and egg dishes
Recipe Location: /Recipes/Japanese/japanese_oyakodon_v1.md
Images Location: /Images/oyakodon/
More from Recipes