Pão de Queijo (Brazilian Cheese Bread)
Pão de queijo is associated with Minas Gerais and eaten throughout Brazil for breakfast or an afternoon snack, often with coffee.
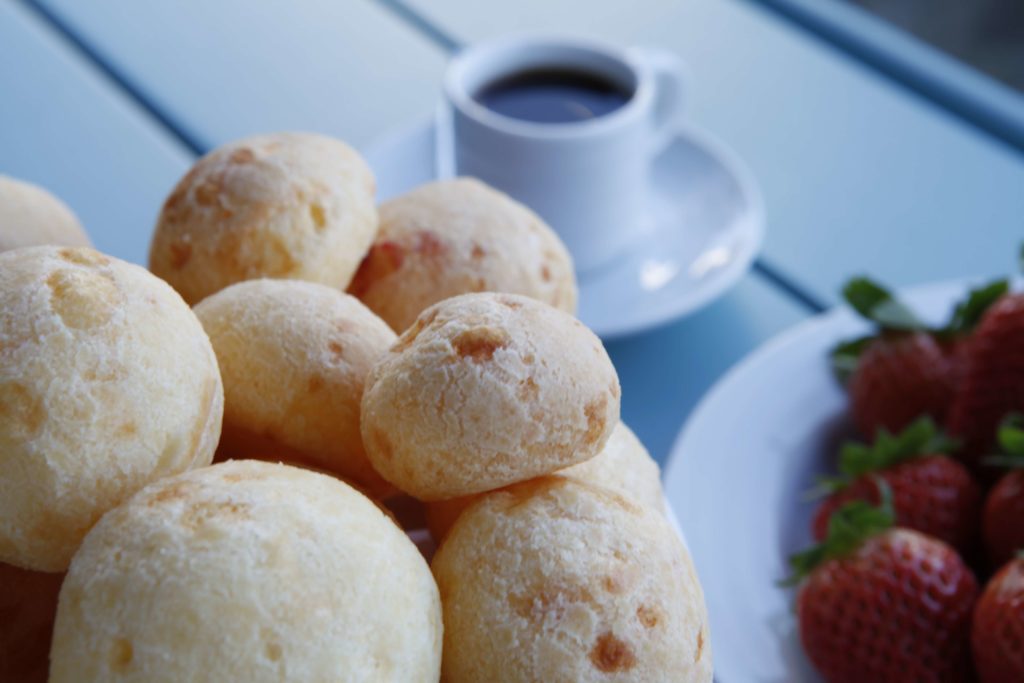
Pão de Queijo (Brazilian Cheese Bread)
Cultural Context
Pão de queijo is associated with Minas Gerais and eaten throughout Brazil for breakfast or an afternoon snack, often with coffee. Tapioca starch gives these small cheese rolls their stretchy, chewy centers. This version combines Easy and Delish's oil-based formula with King Arthur Baking's guidance on scalding and dough consistency; both recipe links are in Sources.
Ingredients
Main Components
- 227 g (8 oz / about 2 cups) tapioca starch, also sold as tapioca flour or polvilho doce
- 80 ml (⅓ cup) sunflower oil
- 120 ml (½ cup) water
- 120 ml (½ cup) pasteurized whole milk
- 3 g (½ teaspoon) fine table salt
- 1 large egg (about 50 g without shell), lightly beaten
- 140 g (5 oz / about 1¼ cups) freshly grated Parmesan made with pasteurized milk
- Up to 28 g (¼ cup) additional tapioca starch, only if needed for shaping
- 5 ml (1 teaspoon) sunflower oil, for hands
For the Sauce/Garnish
- None required; serve the rolls plain.
Substitutions:
- Parmesan → the same weight of firm, aged Minas cheese made with pasteurized milk. Moist fresh cheese changes the dough's consistency.
- Do not replace tapioca starch with whole-root cassava flour; their baking properties differ.
Equipment
- Small saucepan and large heatproof mixing bowl
- Sturdy wooden spoon and flexible spatula
- Kitchen scale and tablespoon measure
- 2 baking sheets lined with parchment paper
- Instant-read thermometer
Instructions
Preparation (Active time: 10 min)
- Prepare the oven: Heat to 375°F (190°C). Line the sheets and measure the ingredients. Put the 227 g tapioca starch in the bowl.
- Scald the starch: Bring the 80 ml oil, water, milk, and salt just to a boil over medium heat. Pour over the starch immediately and stir vigorously until no dry pockets remain. Let cool for 10–15 minutes, until warm rather than hot, before adding egg.
Cooking (Active time: 15 min)
- Mix the dough: Work in the egg, then the cheese, until evenly combined. Rest for 15 minutes. The dough should be sticky but hold a mound. If it spreads flat, mix in the reserved starch a tablespoon at a time, stopping as soon as it holds its shape.
- Shape and bake: Lightly oil your hands with the reserved teaspoon of oil. Divide into about 40 equal balls, roughly 18 g each, and space 1 inch apart on the sheets. Bake for 18–20 minutes, switching shelves halfway through if using both sheets. The rolls should be puffed, lightly golden, and set outside, with a chewy center rather than wet batter. Check a center reaches at least 160°F (71°C); bake longer if necessary.
Assembly & Finishing
- Rest briefly: Leave on the sheets for 2–3 minutes so the crust firms enough to handle.
- Serve warm: Transfer to a serving plate or cloth-lined basket. No sauce or garnish is needed.
Food Safety & Storage
- Minimum safe internal temperature: At least 160°F (71°C) for the egg-containing dough, together with the baking cues above. Do not taste raw dough.
- Storage: Refrigerate baked leftovers in an airtight container within 2 hours, or 1 hour above 90°F (32°C). Keep at or below 40°F (4°C) and use within 3–4 days.
- Freezing: Freeze shaped, unbaked balls on a tray, then bag for up to 30 days. Bake directly from frozen at 375°F (190°C) for about 25–30 minutes, checking the same doneness and temperature targets.
- Reheating: Heat refrigerated rolls in a 350°F (175°C) oven for about 8–12 minutes, until the center reaches 165°F (74°C).
Serving Suggestions
- Serve with freshly brewed coffee for breakfast or an afternoon snack.
- Put the warm rolls in a basket for everyone to help themselves; they are best soon after baking.
Scaling Notes
Half recipe (½×): Beat the egg and weigh out 25 g. Make about 20 rolls; keep their size and oven temperature unchanged.
Double recipe (2×): Make about 80 rolls in two dough batches. Bake in batches and refrigerate waiting dough; allow extra total time for the oven loads.
Chef's Notes
- Sourcing: Look for packaged food-grade tapioca starch in the baking aisle or a Brazilian grocery. Weigh it because cup weights vary by brand.
- Make-ahead: Freeze the shaped dough rather than leaving it on the counter for later baking.
- Variations: Firm aged Minas cheese gives a different cheese flavor; use the substitution above.
- Common pitfalls: Let the scalded dough cool before adding egg. Add extra starch sparingly or the rolls become heavy. The warm interior is naturally elastic, not like a wheat bread crumb.
- Adaptation: Quantities follow Easy and Delish, with metric weights added. Immediate scalding and the small starch adjustment follow King Arthur's technique. The schedule includes cooling, resting, and shaping that short recipe-card estimates can omit.
Nutrition Information (Optional)
Per serving of 4 small rolls: approximately 220 kcal, excluding any extra adjustment starch.
- Protein: 6 g | Fat: 12 g | Carbohydrates: 22 g | Fiber: 0 g
- Sodium: approximately 350 mg | Saturated fat: approximately 3.7 g | Added sugar: 0 g
- Estimate basis for the whole batch: sodium about 1,180 mg from salt + 2,140 mg from Parmesan + 125 mg from milk and egg, divided by 10. Saturated fat about 23 g from cheese + 10 g from oil + 4 g from milk and egg, divided by 10. Brands vary. These are rich cheese snacks, not a low-fat bread.
Sources
- Easy and Delish: Brazilian Cheese Bread — primary ingredient proportions, resting, baking, and freezing method.
- King Arthur Baking: Brazilian Cheese Buns, recipe by Ricardo Gonzalez — comparison recipe and scalding/consistency guidance.
- Wikimedia Commons: Pao de queijo brasil.jpg — hero image by Acfariac.
- Original image download.
- FoodSafety.gov: Safe Minimum Internal Temperatures — egg dishes and reheating.
- USDA FSIS: Leftovers and Food Safety — refrigeration and storage guidance.


Version History:
- v1 (2026-09-11): Initial recipe adaptation by @Codex.
Credits:
- Recipe adaptation: @Codex, synthesized from the two recipes in Sources.
- Testing: @Codex — documentary and automated validation only; not kitchen-tested.
- Verification: @Coordinator — required library metadata; no independent tasting is claimed.
- Food safety/storage: guidance checked against the recipe-validator references and FoodSafety.gov; refrigeration guidance added conservatively for home storage.
- Photography: Acfariac, Wikimedia Commons, CC BY-SA 4.0. Original JPEG retained unchanged; HTML renderer may downscale it. The photograph and its resized reproduction remain under that license. It depicts a representative serving, not a test of this adaptation.
Recipe Location: /Recipes/south-american/south-american_pao-de-queijo_v1.md
Images Location: /Images/pao-de-queijo/
More from Recipes