Grand Canyon Stepped Relief Wall Map
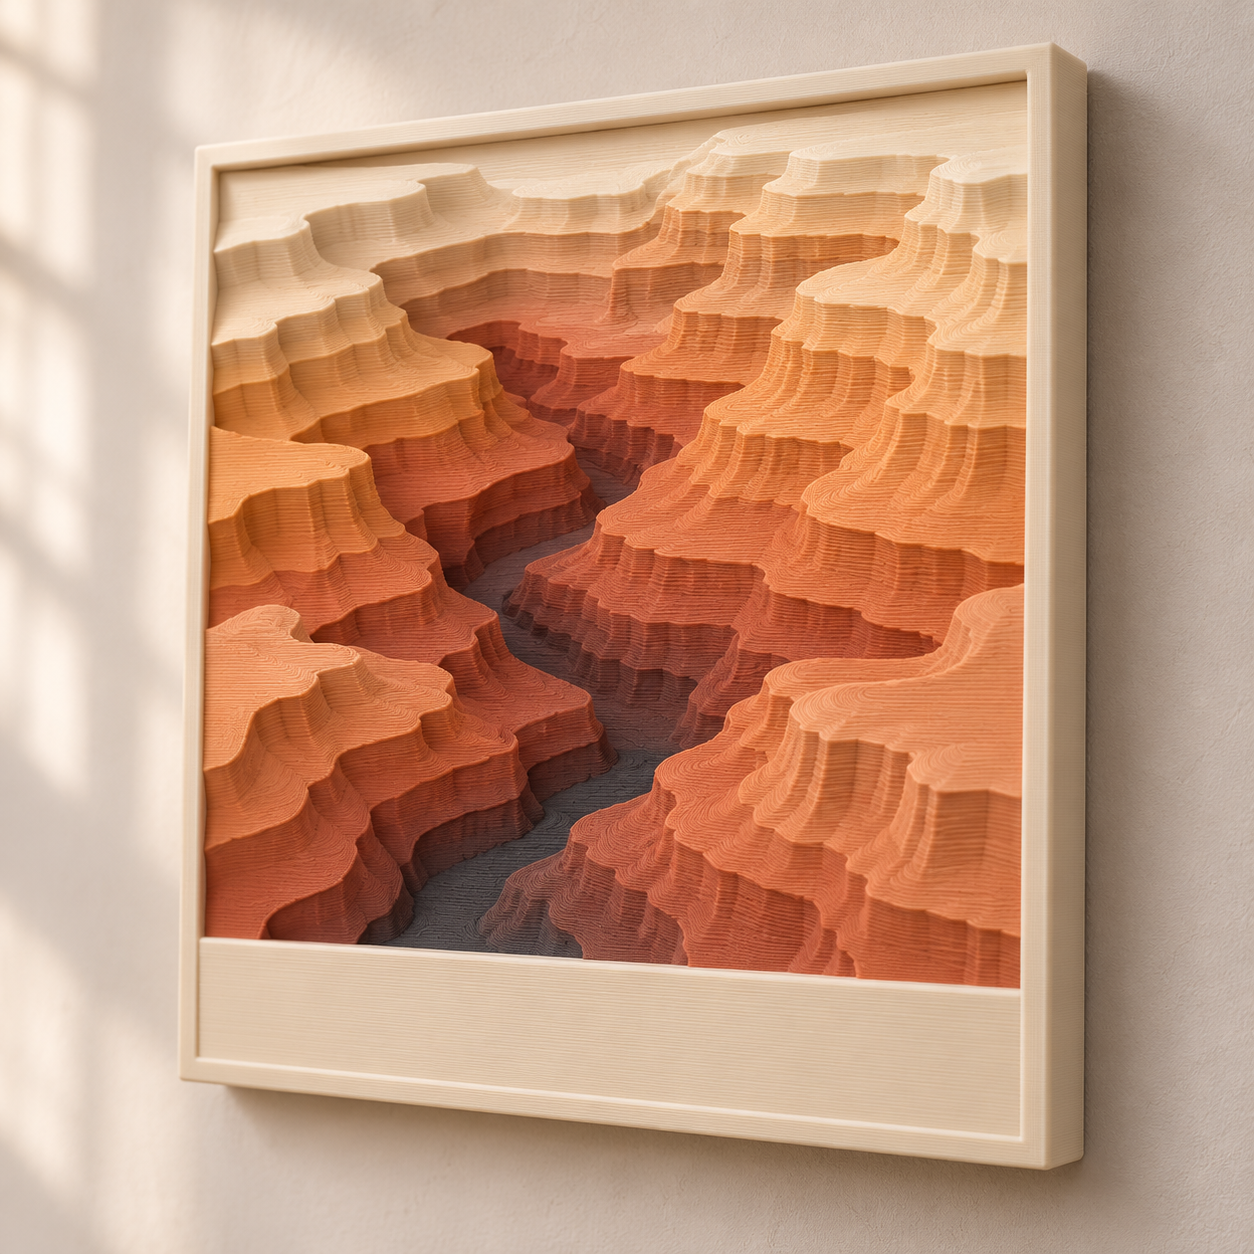
A square wall map of the Grand Canyon as ten terraced colour bands, built from public-domain USGS elevation data, with a swap-in title plate.
Grand Canyon Stepped Relief Wall Map
A square wall map of the Grand Canyon as ten terraced colour bands, built from public-domain USGS elevation data, with a swap-in title plate.
Date: 2026-11-09 Category: Art and Decor Modeling difficulty: Intermediate Estimated print: ~18 h total · ~270 g PLA (estimate) Suggested price: $45–$85 printed · $9 digital file (estimate) Status: Concept
Description
A 200 mm square panel with a raised rim. Inside the rim, the canyon is cut into ten stepped terrain bands, each 1.6 mm taller than the last, so the river gorge sits low and both rims stand at the top. Filament changes at fixed heights turn the steps into a colour gradient: charcoal at the river, terracotta through the walls, sand, then cream on the rim.
A 26 mm band along the bottom holds a separate title plate with raised lettering. It press-fits into a pocket, so one tile can carry any place name, or a date, or coordinates. Two keyhole slots on the back hang it flat on a wall screw.
The terrain is not drawn or traced. It comes from the USGS 3D Elevation Program, which publishes elevation grids free of charge and without use restrictions, and the modeling guide gives the exact window, scale and banding so the result can be rebuilt from the data.
Why it sells
This one rests on taste, not sales rankings, so there is little to cite. The ground truth is the data: USGS says all 3DEP products are free of charge and without use restrictions, and most USGS information is in the public domain, so a sold print is clear on licence as long as the credit line is kept. The gap is the combination: a stepped multicolour map you can reprint for any canyon, peak or lake by swapping the DEM window and the title plate.
Who buys it
Hikers and rafters who have been to the canyon, people buying a gift for them, and anyone who likes terrain as wall art. Sold as a finished print through Etsy or a craft market, or as a file to owners of a multicolour printer. It also works as the first tile of a set: Yosemite Valley, Mount Rainier and Crater Lake use the same recipe.
Design overview
- 200 × 200 × 22 mm tile with a 6 mm rim; terrain window 188 × 156 mm at 1:160,000 (1 mm = 160 m).
- Ten bands at 1.6 mm per step, 16 mm of total relief above a 5 mm floor.
- Colour changes at z = 6.6, 11.4 and 16.2 mm, all on 0.2 mm layer boundaries, so a plain M600 pause does the job.
- Separate 188 × 26 × 4 mm title plate, press-fit with 0.15 mm clearance per side. This is the feature that makes the tile reusable for any place.
- Keyhole hanging slots on the back, no hardware beyond one or two wall screws.
- Data source: USGS 3DEP 1/3 arc-second DEM (about 10 m ground spacing), downloaded from The National Map.
Dimensions
| Measurement | Value (mm) | Notes |
|---|---|---|
| Overall width (X) | 200 | tile; 200 × 200 fits a 220 mm bed with 10 mm to spare per side |
| Overall depth (Y) | 200 | |
| Overall height (Z) | 23 | tile 22 + title text 1 |
| Rim width | 6 | left, right, top and between window and title pocket |
| Floor thickness under terrain | 5 | solid base; lowest band top is 6.6 |
| Terrain window | 188 × 156 | X 6–194, Y 38–194 |
| Band step height | 1.6 | 10 bands, top of band 9 at z = 21.0 |
| Title pocket | 188.3 × 26.3 × 3 | X 5.85–194.15, Y 5.85–32.15, floor z = 19 |
| Title plate | 188 × 26 × 3 (+1 text) | flush with the rim top, text 1 above it |
| Keyhole | Ø9 head, 4.5 × 8 slot, 3.5 deep | at X 50 and 150, Y 160, on the back face |
Parts list
| Part | Qty | Material | Size X×Y×Z (mm) | Print orientation | Supports |
|---|---|---|---|---|---|
| Relief tile with rim | 1 | PLA | 200 × 200 × 22 | back face down, relief facing up | none (keyhole roofs bridge 9 mm) |
| Title plate | 1 | PLA | 188 × 26 × 4 | flat, text facing up | none |
Hardware and non-printed parts
None required. Hang on one or two wall screws with a head of 8.5 mm diameter or less and a head thickness under 3.5 mm. Optional: a drop of cyanoacrylate glue under the title plate.
Fits and tolerances
Title plate in title pocket: press fit, 0.15 mm per side (pocket 188.3 × 26.3 against plate 188 × 26). Print the plate flat so its dimensions come out true, and add one drop of cyanoacrylate glue at each end if it is loose after a few months. Keyhole recesses are a clearance fit for a screw head: Ø9 against a head of 8.5 or less.
Modeling guide
Origin at the front-left corner of the tile's back face. +X runs right along the front edge, +Y runs up the wall toward the top of the tile, +Z comes out toward the viewer. All numbers are mm. The title plate uses its own origin at the plate's centre on the bottom face.
1. Relief tile with rim (×1)
- Sketch on XY: square 200 × 200, corner at the origin (0,0), no corner radius. Extrude +Z 22.
- Sketch on the top face (z = 22). Draw the relief window X 6 to 194, Y 38 to 194 (188 × 156). Cut down to z = 5 (17 deep). This leaves a 6 mm rim on the left, right and top, and a 6 mm bar between the window and the title pocket.
- Sketch on the top face. Draw the title pocket X 5.85 to 194.15, Y 5.85 to 32.15 (188.3 × 26.3, which is the plate plus 0.15 per side). Cut down 3 (pocket floor at z = 19).
- Build the terrain surface from the DEM, not by hand. Scale: 1 mm = 160 m, so the 188 × 156 mm window covers 30.1 km east-west × 25.0 km north-south. Centre it near 36.10 N, 112.10 W (central Grand Canyon, Arizona) and nudge after a preview so the river and both rims sit in frame. Download the USGS 3DEP 1/3 arc-second DEM for that window from The National Map.
- Resample the DEM to a 188 × 156 mm grid at 0.2 mm per cell. Apply a 3 × 3 median filter once, then quantise to 10 bands: band = min(9, floor(10 × (elevation − min) ÷ (max − min))), using the min and max inside the window.
- For each band b (0 to 9) the surface height is z = 5 + 1.6 × (b + 1), so band 0 is z 6.6 and band 9 is z 21.0. Extrude each band's region from z = 5 up to its height inside the window. Simplify each band outline with a 0.4 mm tolerance and drop islands smaller than 1.2 × 1.2 mm so every step is printable.
- Check the vertical exaggeration: VE = 2560 ÷ (max − min elevation in metres). Expect roughly 1.3 to 1.8. Keep it under 2.5 or the walls get too tall and thin.
- On the back face (z = 0) cut two keyhole slots at X 50 and X 150, Y 160: a Ø9 round recess 3.5 deep, plus a 4.5 wide slot running 8 toward +Y from the circle centre, 3.5 deep.
- Fillet the outer top edge of the rim 0.8. Chamfer the bottom outer edge 0.4 to hide first-layer squish.
2. Title plate (×1)
- Sketch on XY: rectangle 188 × 26 centred on the origin, corner radius 0. Extrude 3.
- On the top face emboss the title in a bold sans-serif such as Arial Black, cap height 14, centred, 1.0 high (default text: GRAND CANYON). Stroke width at least 1.6 so it prints with two perimeters.
- Chamfer the bottom perimeter edge 0.3 so the plate seats cleanly.
Slicer colour changes for the tile (0.2 mm layers): insert a colour change before layer 34 (z = 6.6) to terracotta, before layer 58 (z = 11.4) to sand, and before layer 82 (z = 16.2) to cream. Layers 1 to 33 are charcoal.
Print settings
| Setting | Value |
|---|---|
| Material | PLA, four colours (charcoal, terracotta, sand, cream) |
| Nozzle | 0.4 mm |
| Layer height | 0.2 mm |
| Walls / perimeters | 3 on the tile, 2 on the plate |
| Infill | 15% gyroid (tile), 100% (plate) |
| Supports | None |
| Brim / adhesion | None; clean the build plate and use a textured or smooth PEI sheet |
| Notes | Colour changes at layers 34, 58 and 82. Top surface layers set to 5 so each band tread is solid. Print the plate flat with a colour change at layer 16 (z = 3.0) for the text. |
Assembly
- Remove any stringing from the keyhole recesses with a craft knife.
- Press the title plate into its pocket with the text facing out; seat it with a thumb.
- Screw a screw into the wall, leaving 3 mm of shank showing, hang the keyhole over it and slide the tile down.
Variants and upsells
Parametric: swap the DEM window and the title text and the same tile becomes Yosemite Valley, Mount Rainier, Crater Lake or a home town's hills. Try 8 or 12 bands and a 1.2 mm step for a flatter look. Upsells: a two-tile diptych that continues the terrain across the join, a framed 300 mm version printed in four parts, and a blank-title version for customers to personalise. Next pieces in a series: each tile follows the same 200 × 200 grid, so a wall can grow tile by tile.
Selling and distribution
Etsy suits the finished print, since buyers search by place name. Sell the file on MakerWorld or Printables with a CC BY-NC licence and offer the commercial licence separately. The print price covers about 270 g of PLA (roughly $7 to $9 of material), 18 hours of machine time and colour-change labour; $45 to $85 is an estimate. Listing keywords: Grand Canyon wall art, topographic map art, 3D printed relief map, stepped terrain art, canyon decor, Arizona gift, hiker gift, layered map, contour wall art, multicolour 3D print. Put 'Source of elevation data: U.S. Geological Survey' on the listing and in the file description, and do not imply USGS endorses the product.
Risks and IP notes
- Credit: USGS asks for a credit line; for resale it suggests wording such as 'Data compiled by the U.S. Geological Survey' or 'Source of (product): U.S. Geological Survey'. Use one on every listing and do not suggest USGS approved the product.
- Thin terrain walls: sharp ridges can print as spikes. The 0.4 mm simplify tolerance, 1.2 mm island cut-off and 2.5 VE cap are there to prevent it.
- Print length: 17 hours with three colour changes is a lot of failure risk. Print with a brim-free first layer, watch layer 3, and keep a spare plate for the title.
- Mockup is a mood image only; the real terrain comes from the USGS grid, never from the picture.
- Place names such as Grand Canyon are geographic and free to use, but avoid park-service logos or the arrowhead emblem.
Resource links
- USGS 3D Elevation Program — Describes 3DEP as the elevation component of The National Map; all products free of charge and without use restrictions
- USGS 3DEP products and services — Lists the 1 m, 1/3 arc-second (about 10 m) and 1 arc-second DEMs and how to download them
- Acknowledging or crediting USGS — Suggested credit wording; most USGS information is public domain
- OpenTopography acknowledgement and citation policy — Notes that 3DEP datasets have no individual landing page, so citations are compiled by the user
More from 3D Print Designs